How to set up a white label client portal: A step-by-step guide


At a glance
Brand consistency matters: White label portals maintain a unified brand experience through custom color schemes, logos, and visual styling
Implementation timeline: Most businesses can launch a basic white label portal within 2-3 weeks, while complex customizations may take 4-6 weeks
ROI acceleration: Companies using white label portals report 65% faster client onboarding and significantly improved brand recognition
Security first approach: Strong encryption and secure connections are vital for handling sensitive client data
The brand consistency challenge
Professional service firms invest heavily in brand identity – custom logos, consistent colors, carefully crafted messaging. But many undermine this investment when clients access generic portals with another company's branding.
White label client portals solve this by seamlessly extending your brand into every client interaction. This guide walks you through creating a portal experience that reinforces your professional identity.
What makes a portal "white label"
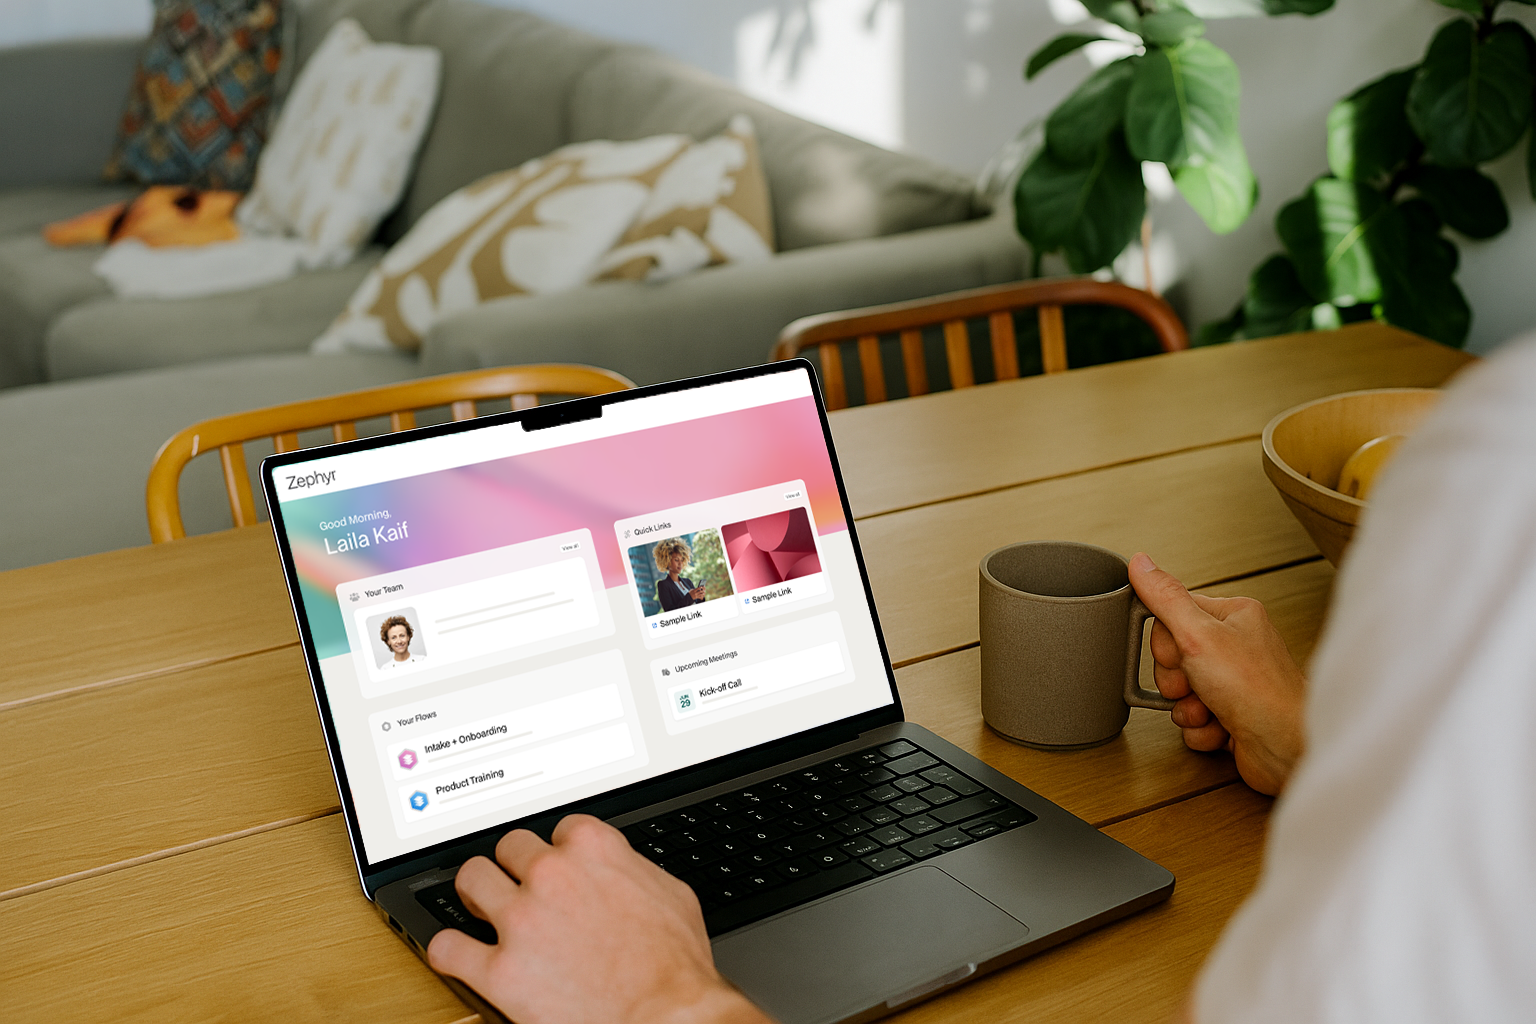
A white-label client portal is a customizable platform you can brand as your own. The software provider's branding disappears completely, replaced by your company's visual identity.
True white labeling includes custom domains, complete visual control over colors and fonts, branded communications, and seamless integration with your existing client experience.
White label vs custom portal comparison
Step-by-step setup process
Step 1: Planning and platform selection
Define requirements: Map out user roles and what each should see. Understanding essential client portal features helps define roles effectively.
Gather brand assets: Collect high-resolution logos, color codes, font specifications, and custom graphics.
Choose a platform: Select a white-label platform that matches your requirements. Use trial periods to test core functionality.
Step 2: Domain and brand configuration
Custom domain setup: Point your subdomain to the platform's servers through DNS configuration and configure SSL certificates.
Brand customization: Upload logos and set brand colors consistently across all interface elements.
Email routing: Configure system emails to send from your domain rather than the platform's default.
Step 3: Content and workflow setup
Information architecture: Organize portal sections logically – Dashboard, Projects, Documents, Communication.
Welcome content: Craft personalized onboarding sequences using your brand voice.
Workflow automation: Configure automated sequences for client onboarding and approval processes.
Step 4: User management and testing
Role definition: Create user roles with appropriate permissions, ensuring clients see only relevant information.
Integration setup: Connect your CRM, accounting software, and essential tools for seamless data flow.
Testing: Test every workflow, integration, and user permission level before client exposure.
5 common setup mistakes to avoid
Over-customization: Focus on brand consistency over unique features. Clients want professional experiences, not design experiments.
Poor mobile experience: Test thoroughly on mobile devices. Portal adoption suffers when mobile experiences are clunky.
Security shortcuts: Never compromise on security for faster launches. Data breaches destroy client trust permanently.
Inadequate user training: Both your team and clients need proper portal training for successful adoption. Many portals fail due to lack of user onboarding.
Insufficient testing: Launch without comprehensive testing across all user roles and workflows. Test every permission level, integration, and workflow before going live.
How Moxo streamlines white label setup
Moxo's client portal eliminates setup complexity while delivering enterprise-grade customization and automation capabilities.
Rapid deployment with deep customization
Visual workflow builder: Create automated client processes without technical expertise through intuitive workflow automation.
Complete brand control: Custom domains, logos, colors, and messaging create seamless brand experiences with zero Moxo branding visible to clients.
Mobile-first design: Responsive interfaces work seamlessly across all devices, ensuring a consistent experience whether clients access portals from computers or phones.
Enterprise security and compliance
Bank-grade encryption: All client data and communications are protected with enterprise-level security, meeting compliance requirements across regulated industries.
Audit trails: Every action and workflow step is logged automatically, providing complete transparency for compliance monitoring.
Real implementation success
Hibernia College achieved 97% student retention after implementing their white-labeled Cohort App using Moxo's collaborative learning platform.
BNP Paribas launched MyWealth, a secure white-labeled hub enabling wealth clients to access comprehensive services remotely.
Peninsula Visa achieved a 93% reduction in processing time by digitizing their entire intake and approval process through Moxo's white-labeled application.
Seamless integrations and scalability
Moxo connects with existing business tools through comprehensive integrations, creating unified client experiences. The platform scales effortlessly from small teams to enterprise operations.
Conclusion
White label client portals transform professional relationships by creating branded digital experiences that reinforce company identity with every interaction. Success depends on balancing customization with usability while maintaining enterprise-grade security.
Understanding what makes great client portals effective helps ensure your implementation drives real business results.
Get started with Moxo today to see how white label portals can strengthen your client relationships.
FAQs
How long does it take to set up a white label client portal?
Basic white label portals can launch within 2-3 weeks with standard customization. Complex implementations with extensive automation may take 4-6 weeks, depending on customization requirements and integration complexity.
What are the most important white label customization features to prioritize?
Focus on visual branding elements first: custom logos, color schemes, and domain configuration create immediate brand recognition. Next, prioritize user experience customizations like navigation structure and welcome messaging.
Can I use my own domain for a white label portal?
Yes, most white label platforms support custom domains or subdomains. You'll configure DNS settings to point your domain to the platform's servers, creating seamless brand experiences where clients never see the software provider's domain.
How do I migrate existing client data to a new white label portal?
Plan data migration in phases, starting with essential client information and active projects. Export data from existing systems in compatible formats (CSV, JSON) and use the portal's import tools or API integrations. Always run test migrations with a small data set first.